Master New York Bagels: Easy Recipe for Bakery-Quality Chewy Crust
Imagine sinking your teeth into a warm, freshly baked bagel – a golden-brown crust yielding to a gloriously chewy interior. For many, this evokes the bustling streets of New York City, home of the iconic bagel. But what if you could recreate that authentic experience right in your own kitchen? The good news is, mastering `homemade New York style bagels` is not only achievable but also surprisingly straightforward. Forget the early morning dash to your local bagel shop; with this comprehensive guide, you'll soon be enjoying bakery-quality bagels that are perfectly customized, incredibly fresh, and ready whenever the craving strikes.
Making bagels from scratch might seem intimidating, but the process is more about understanding a few key techniques than relying on complex equipment. We’ll unveil the secrets to that signature chewy crust and dense, satisfying texture, demonstrating how you can transform simple ingredients into a breakfast masterpiece. Get ready to fill your home with the irresistible aroma of freshly baked bread and discover the profound satisfaction of crafting your very own New York-style bagels.
The Secret to Authentic New York Bagels: What Makes Them Special?
The legend of New York bagels often points to the city's unique water, a belief cherished by many. While water composition can play a minor role, the true magic behind `homemade New York style bagels` lies in a combination of traditional techniques and specific ingredients. Unlike many other breads, bagels are not simply baked; they undergo a crucial two-step cooking process that defines their iconic texture.
*
The Power of Bread Flour and Yeast
The foundation of a chewy bagel is
bread flour. Its higher protein content (compared to all-purpose flour) is essential for developing strong gluten networks, which provide that characteristic pull and chew. Active dry yeast, alongside a touch of sugar, fuels the dough's fermentation, contributing to flavor development and a subtle rise. Fine sea salt is vital for enhancing taste and controlling yeast activity, ensuring a balanced, delicious dough. Warm water (around 110°F) is precisely what's needed to activate the yeast, setting the stage for a lively dough.
*
The Critical Boiling Step: Where the Magic Happens
This is arguably the most distinguishing feature of a true New York bagel. Before baking, bagels are briefly boiled in water. This isn't just a quick dip; it's a transformative process:
*
Crust Development: Boiling gelatinizes the starches on the bagel's exterior, creating that distinctive shiny, crisp, and robust crust that sets New York bagels apart.
*
Moisture Lock: It essentially "sets" the outside of the bagel, locking in moisture and preventing excessive rise during baking, resulting in a denser, chewier interior.
*
Flavor and Color: Adding a touch of baking soda, malt barley syrup, or honey to the boiling water further enhances the crust's browning and imparts a subtle, authentic flavor.
This pre-baking boil is why `homemade New York style bagels` boast a texture that's superior to store-bought varieties, which often skip this step for cost and efficiency, resulting in a softer, bread-like product. For a deeper dive into this comparison, check out our related article:
The Secret to Chewy NYC Bagels: Why Homemade Beats Store-Bought.
Your Step-by-Step Guide to Bakery-Quality Chewy Bagels
Crafting `homemade New York style bagels` is an incredibly rewarding process. Follow these steps, and you’ll be amazed at the professional results you achieve with minimal effort.
*
Gather Your Essential Ingredients:
Accuracy in ingredients is key to the perfect bagel.
*
For the Dough:
* 4 cups (500g)
bread flour, plus extra for dusting (high protein for chewiness)
* 1 tablespoon (12g)
granulated sugar (feeds yeast, adds subtle sweetness)
* 2 teaspoons (7g)
active dry yeast (provides rise and flavor)
* 2 teaspoons (12g)
fine sea salt (enhances flavor, controls yeast)
* 1½ cups (360ml)
warm water, around 110°F (activates yeast)
*
For Boiling:
* 8-10 cups water
* 1 tablespoon baking soda (enhances browning and shine)
* 1-2 tablespoons malt barley syrup or honey (adds authentic flavor and deep color)
*
Optional Toppings/Egg Wash:
* 1 egg white beaten with 1 tablespoon water (for adhesion of toppings)
* Desired toppings (e.g., everything bagel seasoning, sesame seeds)
*
Crafting the Perfect Bagel Dough:
1.
Mix Dry Ingredients: In a large bowl or the bowl of a stand mixer, combine the bread flour, granulated sugar, active dry yeast, and fine sea salt. Whisk briefly to ensure even distribution.
2.
Add Water: Gradually add the warm water to the dry ingredients, mixing with a wooden spoon or dough hook until a shaggy dough forms.
3.
Knead the Dough: Turn the dough out onto a lightly floured surface and knead for 8-10 minutes by hand, or use a stand mixer with a dough hook on medium speed for 6-8 minutes. The dough should become smooth, elastic, and pass the windowpane test (stretch a small piece thinly enough to see light through it without tearing). This extensive kneading is crucial for developing the gluten needed for that signature chew.
4.
First Rest: Place the dough in a lightly oiled bowl, turning once to coat. Cover with plastic wrap and let it rest in a warm place for about 30-45 minutes, or until slightly puffy but not necessarily doubled in size. Bagel dough is dense and doesn't rise as dramatically as other bread doughs.
*
Shaping Your Bagels: The Art of the Hole:
1.
Divide the Dough: Gently punch down the dough and divide it into 8-10 equal pieces (around 100-110g each for standard-sized bagels).
2.
Shape: There are two common methods:
* **Rope Method:** Roll each piece into a 9-inch rope, then overlap the ends by about 1 inch and pinch them firmly together to form a ring. Roll the seam a bit to seal it.
* **Poke Method:** Form each piece into a smooth ball. Using your floured thumb, poke a hole through the center of each ball. Gently stretch the hole to about 1-1.5 inches in diameter, ensuring the ring is even in thickness.
3.
Second Rest (Optional but Recommended): Place the shaped bagels on a lightly floured baking sheet, cover loosely with plastic wrap, and let them rest for another 15-20 minutes. This allows them to relax slightly before boiling.
*
The Critical Boil: Where the Magic Happens:
1.
Preheat Oven & Prepare Boiling Water: While the bagels rest, preheat your oven to 425°F (220°C). Fill a large, wide pot with 8-10 cups of water, add the baking soda and malt barley syrup (or honey), and bring to a rolling boil.
2.
Boil the Bagels: Gently drop 2-3 bagels into the boiling water at a time, ensuring they don't overcrowd the pot. Boil for 30-60 seconds per side. For an extra chewy exterior, you can boil them for up to 90 seconds per side.
3.
Drain: Using a slotted spoon, carefully remove the boiled bagels, letting excess water drain off. Transfer them to a baking sheet lined with parchment paper or a silicone mat.
*
Baking to Golden Perfection:
1.
Apply Toppings (Optional): If adding toppings, lightly brush the tops of the boiled bagels with the egg white wash immediately after boiling. Sprinkle generously with your chosen seasonings.
2.
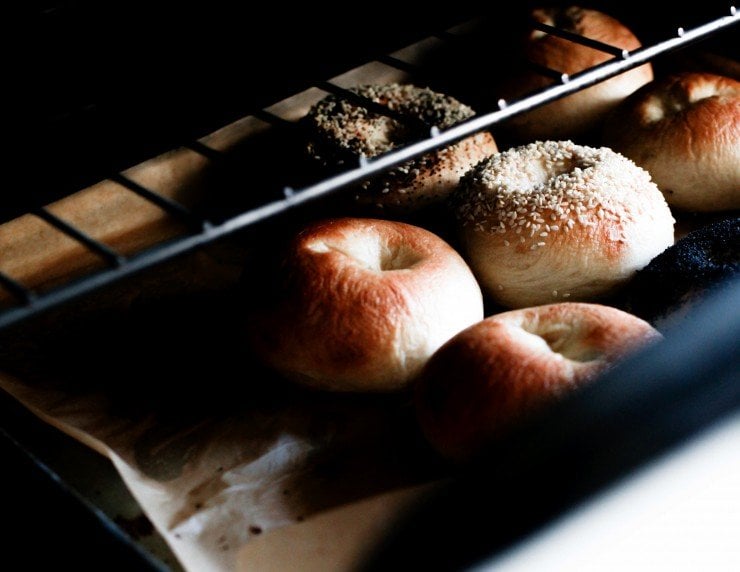
Bake: Bake the bagels in the preheated oven for 18-25 minutes, or until they are deeply golden brown and sound hollow when tapped on the bottom. Rotate the baking sheet halfway through for even browning.
3.
Cool: Transfer the baked bagels to a wire rack to cool completely. Resist the urge to cut into them immediately, as they continue to cook and set as they cool.
Endless Customization: Transform Your Bagels with Creative Flavors
One of the greatest joys of making `homemade New York style bagels` is the freedom to customize them to your heart's content. Move beyond plain and explore a universe of flavors!
*
Classic & Savory Options:
*
Everything Bagels: The undisputed champion of variety. After boiling and egg-washing, generously sprinkle with a high-quality everything bagel seasoning blend (typically sesame seeds, poppy seeds, dried garlic, dried onion, and coarse salt).
*
Onion Bagels: For an intense savory kick, stir 2 tablespoons of dried minced onion into the flour along with the yeast during the initial dough mixing.
*
Cheddar-Jalapeño Bagels: A spicy and cheesy delight. After boiling, brush with egg wash, then top each bagel with about 1 tablespoon of shredded cheddar cheese and 3-4 slices of pickled jalapeño before baking. The cheese will melt and crisp up beautifully.
*
Sesame Seed or Poppy Seed: Simply brush with an egg wash and sprinkle with either sesame or poppy seeds for a classic, nutty crunch.
*
Sweet & Delightful Twists:
*
Cinnamon-Raisin Bagels: A timeless sweet treat. Stir in ½ cup of raisins with the all-purpose flour at the end of the initial dough mixing. After boiling and egg-washing, sprinkle each bagel with ¼ teaspoon of cinnamon-sugar before baking.
*
Blueberry Bagels: Gently fold in ¾ cup of fresh or frozen (not thawed) blueberries during the last minute of kneading. Be careful not to overmix, or the blueberries might burst and stain the dough.
*
Honey-Wheat Bagels: Substitute some of the bread flour with whole wheat flour (e.g., 1 cup whole wheat, 3 cups bread flour) and add an extra tablespoon of honey to the dough for a richer, heartier flavor.
The possibilities are truly endless! Feel free to experiment with different cheeses, herbs, spices, or dried fruits to create your signature bagel. For more inspiration and ideas on how to store and serve your incredible creations, delve into our article:
Customize Homemade NYC Bagels: Endless Flavors, Freezer-Friendly.
Pro Tips for Bagel Bliss: Storage, Serving, and Troubleshooting
You’ve put in the effort to create fantastic `homemade New York style bagels`, now let’s ensure they stay perfect and that you master every aspect of the bagel-making journey.
*
Freezer-Friendly Storage for Grab-and-Go Bagels:
One of the best advantages of making bagels at home is being able to stock your freezer.
*
Cool Completely: Ensure bagels are completely cooled to room temperature before freezing. Any residual warmth will create condensation and freezer burn.
*
Airtight Packaging: Pack cooled bagels in airtight freezer containers or heavy-duty plastic freezer bags. Remove as much air as possible to prevent ice crystals.
*
Label and Freeze: Label with the date and freeze for up to 2 weeks for optimal freshness. They can last longer, but quality may diminish.
*
Thawing & Reheating: Thaw frozen bagels for about 2 hours at room temperature. For best results, halve and toast them before serving. A quick refresh in a toaster oven can bring back some of that fresh-baked crispness.
*
Troubleshooting Common Bagel Challenges:
*
Bagels are Too Dense/Hard: This could be due to not enough kneading (gluten not developed), water not warm enough to activate yeast, or yeast being old. Ensure your yeast is fresh and your water temperature is accurate.
*
Bagels Aren't Chewy Enough: Use high-protein bread flour. Ensure you're boiling them long enough (at least 30-60 seconds per side). The boiling step is crucial for chewiness.
*
Bagels Are Flat: Over-proofing (dough rising too much before boiling) can lead to flat bagels. Also, ensure you create good surface tension when shaping and sealing the hole.
*
Crust Isn't Shiny/Golden: Make sure you're adding baking soda and malt syrup/honey to the boiling water, and boil for the recommended time. An egg wash also aids in browning and shine.
*
Serving Suggestions:
The perfect `homemade New York style bagels` deserve equally delicious accompaniments.
*
Classic Cream Cheese: From plain to scallion, strawberry, or lox-flavored cream cheese.
*
Savory Sandwiches: Load them up with smoked salmon (lox), capers, red onion, and dill, or create a classic breakfast sandwich with egg, cheese, and bacon.
*
Sweet Toppings: Butter, jam, or a drizzle of honey are simple but satisfying.
Conclusion
There’s truly nothing quite like the experience of biting into a `homemade New York style bagel`, fresh from your own oven. The perfectly golden, chewy crust, the tender yet dense interior, and the freedom to customize every aspect far surpass anything you'll find pre-packaged. By understanding the critical role of bread flour, the essential boiling technique, and a few simple steps, you can confidently bring the authentic taste of a classic NYC deli straight to your kitchen. This journey from simple ingredients to bakery-quality bagels is not just about making food; it's about mastering a craft, enjoying superior taste, and ensuring a delicious start to any day, whenever you desire. So, roll up your sleeves, embrace the process, and prepare to delight your taste buds with the best bagels you've ever had!